Creating an Internet Explorer Testing Environment on a Mac
by Bandicoot Marketing on | Posted in Tutorials | 36 comments
I have been a Mac man for a long time. I know some people hate ’em for whatever reason, but I have always found them to be great machines for what I do. The only thing that makes it a little tough when it comes to working on the web though, is the fact that you can’t really test in IE, unless you install something like Parallels Desktops and Windows. That works somewhat, but a copy of Parallels Desktop will run you $79 and Windows can cost you $100 or more. In the end, it costs quite a bit and you can only run one version of IE. That doesn’t really make for a great testing environment, especially when there is a better option out there that is absolutely FREE.
I had previously written about Installing Microsoft Explorer 6 on a Mac but recently I discovered a better way of setting up a testing environment for IE thanks to Andrew Odri and Jeff Couturier and their great articles. (All credit goes to them in steering me in the right direction on this one.) There were a few problems I encountered along the way so I thought it would be a good idea to let you know exactly how I got it to work.
Here is what you need before we start:
- VirtualBox 2.0.6 – Only version 2.0.6 will work for this tutorial.
- Q – this make it possible to install 3 versions of IE
- Zipeg – to convert the IE files to a format we can use
- Internet Explorer – download these three files: IE6-XPSP3.exe, IE7-XPSP3.exe, IE8-XPSP3.EXE
Once you have downloaded everything, install VirtualBox, Q and Zipeg.
I’ve broken it down into three sections. First, I’ll show you how to get everything ready. Next I’ll walk you through installing IE with VirtualBox. Then I’ll help make sure everything runs properly.
For this tutorial, I’ll use IE6-XPSP3.exe as an example. Afterward, just repeat all the steps below to install IE 7 and IE 8.
2. Create a sub-folder in your Applications directory called “IE”.
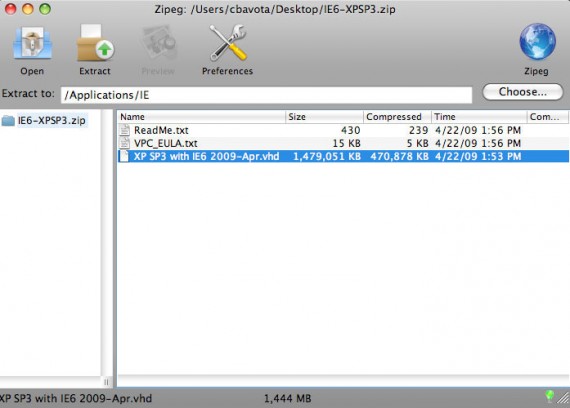
3. Launch Zipeg and drag the IE6-XPSP3.zip file into it for extraction. Extract the .vhd files into the IE sub-folder you created.

4. Open up your IE sub-folder and you will see a folder called “IE6-XPSP3”. Open that folder and you should have a file called “XP SP3 with IE6 2009-Apr.vhd. Rename that sucker something simple like ie6-xpsp3.vhd.
5. Now launch Terminal (Applications => Utilities => Terminal) and type:
/Applications/Q.app/Contents/MacOS/qemu-img convert -O raw -f vpc /Applications/IE/IE6-XPSP3/ie6-xpsp3.vhd /Applications/IE/IE6-XPSP3/ie6-xpsp3.raw
This will take about 5 minutes to process so just wait until your Terminal prompt returns.
6. Next, type:
VBoxManage convertdd /Applications/IE/IE6-XPSP3/ie6-xpsp3.raw /Applications/IE/IE6-XPSP3/ie6-xpsp3.vdi
This will also take a few minutes so just wait for that prompt to return.
Now we need to launch VirtualBox to get the show on the road. Once you have the software opened do the following.
 1. Click the New button in the top left to enter the “Create New Virtual Machine” wizard.
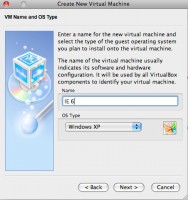
2. Click “Next” and enter “IE 6” in the Name field and select “Windows XP” as the OS Type.
3. Click past the next screen until you reach the Virtual Hard Disk page. Click the Existing button and a new window will open.
4. Select “Add”. Browse through your folders to Applications => IE => IE6-XPSP3 and select the .vdi file that we created through our Terminal commands above. You will return to the Virtual Hard Disk page. Click next.
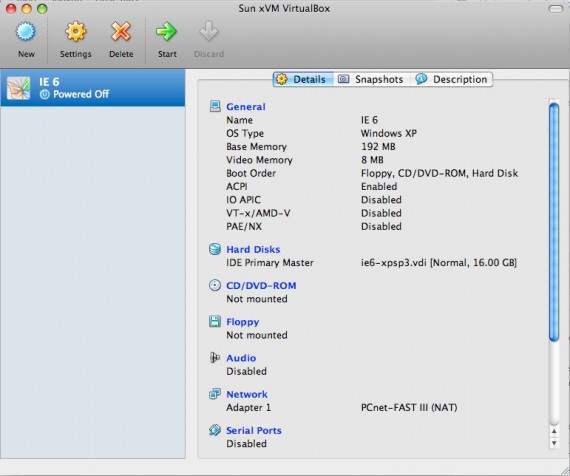
5. You should now be at the Summary screen. Click finish and you will see a selection for IE 6 in VirtualBox.
Now that everything is installed, let’s launch IE 6 and make sure it runs properly.
2. A bunch of hardware prompts will appear. Just cancel them all. Go to the Start menu and select Run. Type “cmd” to open the command line.
3. Type the following at the command prompt.
cd \WINDOWS\system32\drivers
ren processr.sys processr.old
exit
4. Restart Windows.
5. When Windows loads up, close all those popups. Go to the top menu of Virtualbox VM (your Windows window) and select Devices=> Install Guest Additions. Click through the windows. If a warning comes up just click Continue Anyway and move on. When the process is complete, select Reboot Now and click Finish.
6. After Windows reboots, more popup windows will appear. Cancel them all and go to Start => My Computer, right-click and select Properties. The System Properties window will appear. Go to Hardware => Device Manager.
7. Now you will see a list with two items that are not recognized. First, select Batteries => Unknown device and right-click. Disable this because you will never use it. Next go to Ethernet Controller and right-click. Select Update Driver.
8. In the Hardware Update Wizard, select the middle option “Yes now and every time I connect the device” and click next. Click next again to install the driver automatically. Close all your windows.
9. Click on the desktop icon to open Internet Explorer 6.
And there you have it. Repeat the process to install IE 7 and IE 8 so you can round off your testing environment.
TIP: If you don’t want to wait for Windows to load each time you open your VirtualBox VM, click the red x at the top on your window and select Save the machine state. Next time you access your IE 6 VM it will be exactly how you left it.


36 comments for “Creating an Internet Explorer Testing Environment on a Mac”