
Working with Custom Admin Pointers in WordPress
by Bandicoot Marketing on | Posted in Tutorials | 6 comments
When WordPress 3.3 was released we were introduced to the new Admin Pointers, those blue and white boxes that had tips on how to use some of the new features. Seeing how WP used them to help guide users through some of the new features was brilliant.
So why not try to take advantage of the Admin Pointers when developing your own themes and plugins?
There is no real API as of yet, but hooking into the JS files and creating some helper functions isn’t that difficult. All it takes is a few functions to add some custom Admin Pointers.
First thing we need to do is enqueue the JS and CSS files:
add_action( 'admin_enqueue_scripts', 'custom_admin_pointers_header' );

function custom_admin_pointers_header() {
   if ( custom_admin_pointers_check() ) {
      add_action( 'admin_print_footer_scripts', 'custom_admin_pointers_footer' );

      wp_enqueue_script( 'wp-pointer' );
      wp_enqueue_style( 'wp-pointer' );
   }
}
We also need a couple of helper functions to make sure things work the way they should. The first is the conditional check:
function custom_admin_pointers_check() {
   $admin_pointers = custom_admin_pointers();
   foreach ( $admin_pointers as $pointer => $array ) {
      if ( $array['active'] )
         return true;
   }
}
Next comes the footer script:
function custom_admin_pointers_footer() {
   $admin_pointers = custom_admin_pointers();
   ?>
<script type="text/javascript">
/* <![CDATA[ */
( function($) {
   <?php
   foreach ( $admin_pointers as $pointer => $array ) {
      if ( $array['active'] ) {
         ?>
         $( '<?php echo $array['anchor_id']; ?>' ).pointer( {
            content: '<?php echo $array['content']; ?>',
            position: {
            edge: '<?php echo $array['edge']; ?>',
            align: '<?php echo $array['align']; ?>'
         },
            close: function() {
               $.post( ajaxurl, {
                  pointer: '<?php echo $pointer; ?>',
                  action: 'dismiss-wp-pointer'
               } );
            }
         } ).pointer( 'open' );
         <?php
      }
   }
   ?>
} )(jQuery);
/* ]]> */
</script>
   <?php
}
With all of that in place, the basic functionality for our custom admin pointers is ready. Now we just need to put together the actual array so that we can set up where we want out pointers to appear and what we want them to say.
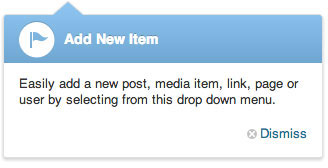
Here is an example of a custom admin pointer that will appear below the “+ New” item in the admin bar menu:
function custom_admin_pointers() {
   $dismissed = explode( ',', (string) get_user_meta( get_current_user_id(), 'dismissed_wp_pointers', true ) );
   $version = '1_0'; // replace all periods in 1.0 with an underscore
   $prefix = 'custom_admin_pointers' . $version . '_';

   $new_pointer_content = '<h3>' . __( 'Add New Item' ) . '</h3>';
   $new_pointer_content .= '<p>' . __( 'Easily add a new post, media item, link, page or user by selecting from this drop down menu.' ) . '</p>';

   return array(
      $prefix . 'new_items' => array(
         'content' => $new_pointer_content,
         'anchor_id' => '#wp-admin-bar-new-content',
         'edge' => 'top',
         'align' => 'left',
         'active' => ( ! in_array( $prefix . 'new_items', $dismissed ) )
      ),
   );
}
This snippet needs a bit of explaining so let’s break down the items:
/**
 * This is the version number of your theme/plugin. It needs to be updated each time you
 * update your theme/plugin or else the admin pointers will not re-appear.
 */
$version = '1_0'; // replace all periods in 1.0 with an underscore
/**
 * This is the title and content that you want to appear in the admin pointer. Do not change
 * the HTML tags, only modify the text within the single quotes.
 */
$new_pointer_content = '<h3>' . __( 'Add New Item' ) . '</h3>';
$new_pointer_content .= '<p>' . __( 'Easily add a new post, media item, link, page or user by selecting from this drop down menu.' ) . '</p>';
The return array needs to be broken down even more:
/**
 * This is the actual array that will contain the elements needed to display your custom
 * admin pointers.
 */
// Make sure the 'new_items' string is unique to each new array item
$prefix . 'new_items' => array(

   // The content needs to point to what we created above in the $new_pointer_content variable
   'content' => $new_pointer_content,

   // In order for the custom pointer to appear in the right location we need to specify the ID
   // of the element we want it to appear next to
   'anchor_id' => '#wp-admin-bar-new-content',

   // On what edge do we want the pointer to appear. Options are 'top', 'left', 'right', 'bottom'
   'edge' => 'top',

   // How do we want out custom pointer to align to the element it is attached to. Options are
   // 'left', 'right', 'center'
   'align' => 'left',

   // This is how we tell the pointer to be dismissed or not. Make sure that the 'new_items'
   // string matches the string at the beginning of the array item
   'active' => ( ! in_array( $prefix . 'new_items', $dismissed ) )
),
With all of this in place, our new code should look something like this:
add_action( 'admin_enqueue_scripts', 'custom_admin_pointers_header' );

function custom_admin_pointers_header() {
   if ( custom_admin_pointers_check() ) {
      add_action( 'admin_print_footer_scripts', 'custom_admin_pointers_footer' );

      wp_enqueue_script( 'wp-pointer' );
      wp_enqueue_style( 'wp-pointer' );
   }
}

function custom_admin_pointers_check() {
   $admin_pointers = custom_admin_pointers();
   foreach ( $admin_pointers as $pointer => $array ) {
      if ( $array['active'] )
         return true;
   }
}

function custom_admin_pointers_footer() {
   $admin_pointers = custom_admin_pointers();
   ?>
<script type="text/javascript">
/* <![CDATA[ */
( function($) {
   <?php
   foreach ( $admin_pointers as $pointer => $array ) {
      if ( $array['active'] ) {
         ?>
         $( '<?php echo $array['anchor_id']; ?>' ).pointer( {
            content: '<?php echo $array['content']; ?>',
            position: {
            edge: '<?php echo $array['edge']; ?>',
            align: '<?php echo $array['align']; ?>'
         },
            close: function() {
               $.post( ajaxurl, {
                  pointer: '<?php echo $pointer; ?>',
                  action: 'dismiss-wp-pointer'
               } );
            }
         } ).pointer( 'open' );
         <?php
      }
   }
   ?>
} )(jQuery);
/* ]]> */
</script>
   <?php
}

function custom_admin_pointers() {
   $dismissed = explode( ',', (string) get_user_meta( get_current_user_id(), 'dismissed_wp_pointers', true ) );
   $version = '1_0'; // replace all periods in 1.0 with an underscore
   $prefix = 'custom_admin_pointers' . $version . '_';

   $new_pointer_content = '<h3>' . __( 'Add New Item' ) . '</h3>';
   $new_pointer_content .= '<p>' . __( 'Easily add a new post, media item, link, page or user by selecting from this drop down menu.' ) . '</p>';

   return array(
      $prefix . 'new_items' => array(
         'content' => $new_pointer_content,
         'anchor_id' => '#wp-admin-bar-new-content',
         'edge' => 'top',
         'align' => 'left',
         'active' => ( ! in_array( $prefix . 'new_items', $dismissed ) )
      ),
   );
}
With this added to your theme’s functions.php file or your plugin’s main init file you now have the ability to add custom admin pointers to any element that you want your user to notice. You can add more items to the final array to create as many custom admin pointers as you heart desires… or your theme/plugin requires.
6 comments for “Working with Custom Admin Pointers in WordPress”